
How to Turn a Hybrid Pen Blank into a Pen

A hybrid pen blank is part wood and part resin, so it turns a little differently from a plain wood or plain acrylic blank. This is how I take one of my grapevine and Alumilite hybrid blanks all the way to a finished pen: preparing the blank, turning it, sanding, a CA glue finish, Micro-Mesh, polish and assembly.
The process is the same whether you're making a rollerball or a hybrid fountain pen. I've also used it on sweet gum pod, pinecone and colored pencil blanks cast in Alumilite, and I'll point out the problems those blanks threw at me along the way.
What you need
- A hybrid pen blank (wood or other natural material cast in resin)
- A pen kit, such as a rollerball or fountain pen kit, with its brass tubes and bushings
- Drill bits sized for your kit's tubes
- Glue for the brass tubes
- A barrel trimmer sized for your tubes
- A lathe and turning tools (I've been using a carbide-insert tool for roughing and a small gouge for touching up)
- Sandpaper from about 120 grit up to 600
- Denatured alcohol and paper towel
- Thin CA glue and thick (or medium) CA glue, plus CA accelerator. I use Stick Fast.
- Micro-Mesh pads, 600 through 12,000
- HUT Ultra Gloss plastic polish and a microfiber cloth
- A way to press the kit together. I use a pen kit assembly vise from Penn State Industries.
How to turn a hybrid pen blank, step by step
Step 1: Cut the blank to size for your kit
- Cut the blank into the pieces your kit calls for. A rollerball kit like the Junior Gentleman's 2 has a body and a cap: the body is the longer piece with a longer, thinner tube, and the cap is shorter with a thicker tube.
- Some fountain pen kits make this easier. The Penn State Industries fountain pen kit I used for my grapevine hybrid fountain pen has a 10 mm tube in both halves, so one drill bit and one barrel trimmer covers the whole pen. That makes prep a lot faster.
Step 2: Drill the blanks
Drill each piece all the way through with the right bit for its tube. On a rollerball you're drilling two different sizes, one for the body and one for the cap.
Step 3: Glue in the brass tubes
- Glue the tubes into the drilled holes and let them dry before you barrel trim.
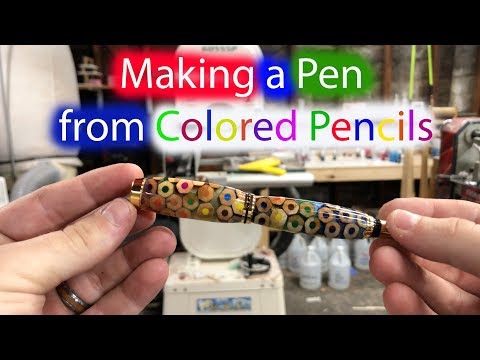
- If your resin is clear, think about the tube showing through. On my colored pencil blank I colored the tubes with a Sharpie before gluing them in so the brass wouldn't show. The fit was so tight in spots that it rubbed some of the Sharpie off. Letting it dry another 10 to 15 minutes might have helped. It still came out a grayish color, which worked better for me than bare brass and made the colors pop. I'd planned to use black paint but didn't have any.
Step 4: Barrel trim both pieces
The barrel trimmer makes the ends of the blank flush and perpendicular to the tube. That matters because when you turn down to the bushings, everything ends up flush and true with the kit parts when you press it together. I know I'm flush when I see a little of the brass tube get shiny.
Step 5: Mount the blank and turn it down to the bushings
- Put the blanks on the lathe with the kit's bushings and turn down until the blank is flush with the bushings.
- I rough with a carbide-insert tool. It's versatile, it roughs well, and it gets in on the edges. I touch up the sides with a small gouge.
- Take normal cuts with sharp tools. In my sweet gum pod fountain pen video I took much more aggressive cuts than I normally do, with tools I should have sharpened first. That blank still had almost no chip-out, just one or two really small chips.
- If the wood starts to get stringy or pieces start coming loose, stop and put on some thin CA glue to hold it together, then keep going. I had to do this a few times on the colored pencil pen.
Step 6: Fix any voids or chips before finishing
Fill small voids or chips with CA glue. On my pinecone pen I'd used too much hot glue when I made the blank, which left a deep spot. I filled it with turning shavings and CA. The shavings I used came out looking white; wood shavings would have blended in best. I put that spot under the clip when I assembled the pen.
Step 7: Sand before the finish
- I start at about 120 or 150 grit and work up to 600.
- Some people think that's unnecessary when you're putting a CA finish on top, but I think it matters. The CA finish is basically a clear acrylic shell, and you're looking through it at the pen. The smoother and more polished that surface is, the better the whole finish looks, and you won't have bumps.
Step 8: Clean with denatured alcohol
Wipe the whole blank down to get the sanding dust off. Denatured alcohol dries very quickly, so you aren't waiting around like you would be with water, and the resin doesn't soak it up. This is also when you first get a good look at what the finished pen will look like. If dust or colored grit got sanded into porous wood (it happened on my colored pencil blank), scrub those spots with denatured alcohol before you put on any CA.

Step 9: Apply the CA glue finish
- Put on one or two coats of thin CA with no accelerator and let them soak in. I got this tip from Zach Higgins: without accelerator, the thin CA has time to get into the pores of the wood and into any voids and cracks. With accelerator it hardens instantly and doesn't soak in. On blanks with lots of voids, like sweet gum pods, I think this is especially important.
- Then build up with thick CA (I've also used medium), spraying accelerator after the coats. The thick CA gives you enough thickness that when you sand you get a smooth surface without cutting back through the glue. Medium or thick goes on thicker, so it goes faster for me, but that's personal preference.
- I apply it with the lathe on its slowest speed, using little strips of paper towel.
Step 10: Wet sand with Micro-Mesh
I go from 600 (yellow) all the way to 12,000 (gray). Micro-Mesh grits don't match regular sandpaper grits; it's its own system. Spend the most time on the 600. Get it as smooth and bump-free as you can, because then the later pads can do their job.
Step 11: Polish
Put a little HUT Ultra Gloss on with a microfiber cloth and buff it off. It takes out the tiny scratches left from sanding and leaves the pen spotless and very shiny.
Step 12: Assemble the pen
Press the kit parts together following the instructions for your kit. I use a pen kit assembly vise. On a pen with a clip, screw the cap on before you press it together so the clip ends up exactly where you want it. That's also how you can hide a small flaw under the clip.

My finish has changed since my 2016 grapevine hybrid fountain pen video. Back then I sanded 220, 320, 400 and 600 before finishing and sprayed accelerator after every coat of CA, putting on anywhere from 10 to 20 coats (more when the blank had voids to fill). In my later videos (2017 on) I start sanding around 120 to 150, put the first thin coats on without accelerator so they soak in, and then build with thicker CA. The steps above are my newer method.
Common problems and fixes
Chip-out where resin meets resin
When I recast Alumilite cut-offs into new blanks, the new resin didn't stick perfectly to the old pieces, and I got a slight chip-out at one of those spots. The CA finish took care of it, and you can't feel it in the finished pen. The real fix is at casting time: rough up the old resin with sandpaper before you cast around it.
Stringy wood or pieces coming loose
Some materials, like the wood in colored pencils, get stringy and flare off, and slanted pieces can lose bits of lead. Stop and wick thin CA into the area, let it set, and keep turning.
Voids or a deep spot from casting
Fill it with CA glue and shavings. Match the shavings to the material if you can: wood shavings blend into wood. If it still shows, put it under the clip when you assemble.
Dirt or color sanded into the wood
Porous wood can pick up dust and colored grit while you sand. Scrub it out with denatured alcohol before the first coat of CA. Once the CA is on, it won't happen again.
Brass tube showing through clear resin
Color the tube before you glue it in, and let the color dry fully so a tight fit doesn't rub it off.
FAQ
Do I need to sand before applying a CA finish?
I do, from about 120 or 150 up to 600. The CA is a clear shell, so the surface underneath shows through it. A smoother, more polished surface under the CA makes for a better finish.
Why not use accelerator on the first coats of CA?
Without accelerator, the first one or two coats of thin CA soak into the pores of the wood and fill voids and cracks. Accelerator makes it harden instantly before it can soak in. After those first coats I use accelerator with the thicker CA.
What grits do you use for turning resin pen blanks?
Sandpaper from about 120 to 600 before the finish, then Micro-Mesh from 600 to 12,000 wet over the CA, then HUT Ultra Gloss polish.
Why a CA finish instead of wax?
I use wax on my barrel stave products, but on hybrid and resin pens I use CA. On my colored pencil pen I picked CA because I thought it would be by far the best finish for durability, and for keeping everything in the blank intact long term.
Can I use one drill bit for a hybrid fountain pen?
It depends on the kit. The Penn State Industries fountain pen kit I used has 10 mm tubes in both halves, so one drill bit and one barrel trimmer covers the whole pen. The rollerball kits I've used need two sizes, a thinner tube for the body and a thicker one for the cap.
Do hybrid blanks chip out a lot?
I've heard from people who had a huge chip-out problem with sweet gum pod blanks, but mine had almost no chip-out even with aggressive cuts. The chip-out on my cut-off pen came from new resin that didn't stick well to old resin, and that's a casting problem.
If you want more detail on the finish, see finishing resin and wood pen blanks, and if you'd like to make your own blanks, see how to make hybrid pen blanks. If you'd rather start turning right away, my grapevine and Alumilite hybrid blanks below are the same kind of blank I turned in these videos.

